For CoMapeo Mobile v8
Creating a New Observation
What are Observations?
Observations are the heart of CoMapeo. Observations are data points saved as GPS coordinates with a defined category and date and time. The GPS sensors of a mobile device are used to record coordinates and accuracy and save it to an observation. Observations can also have text notes, photos and audio recordings.
Create a New Observation
Step by step
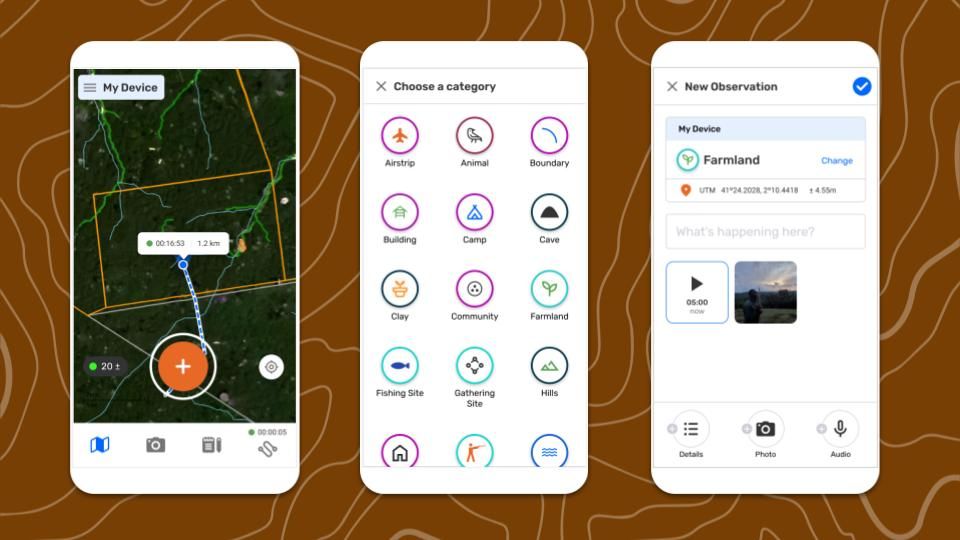
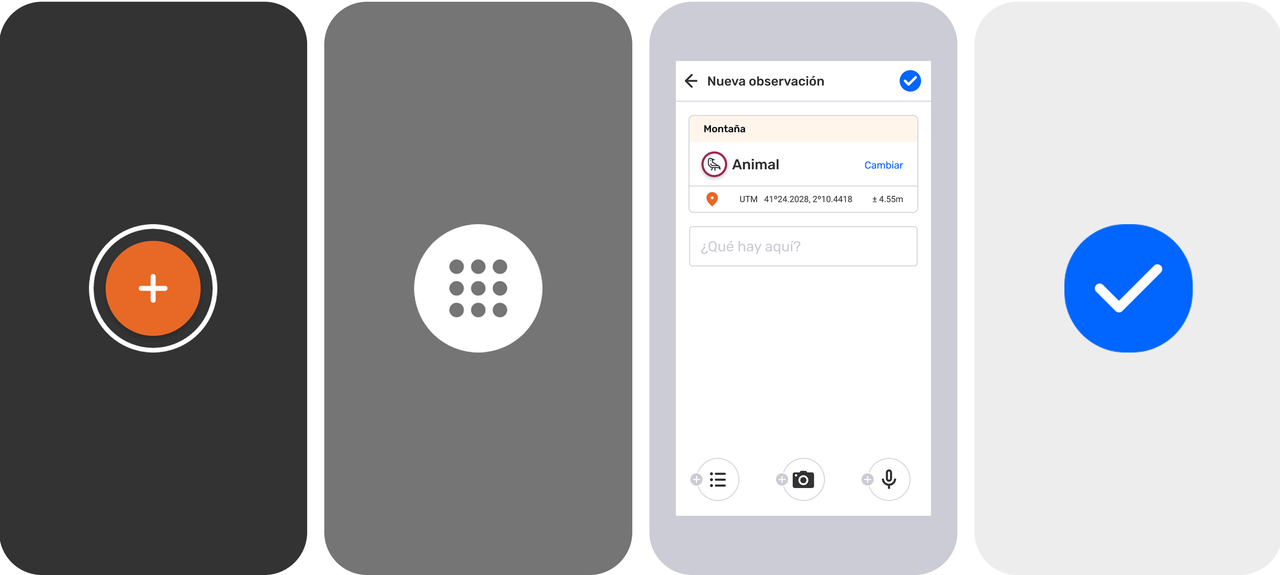
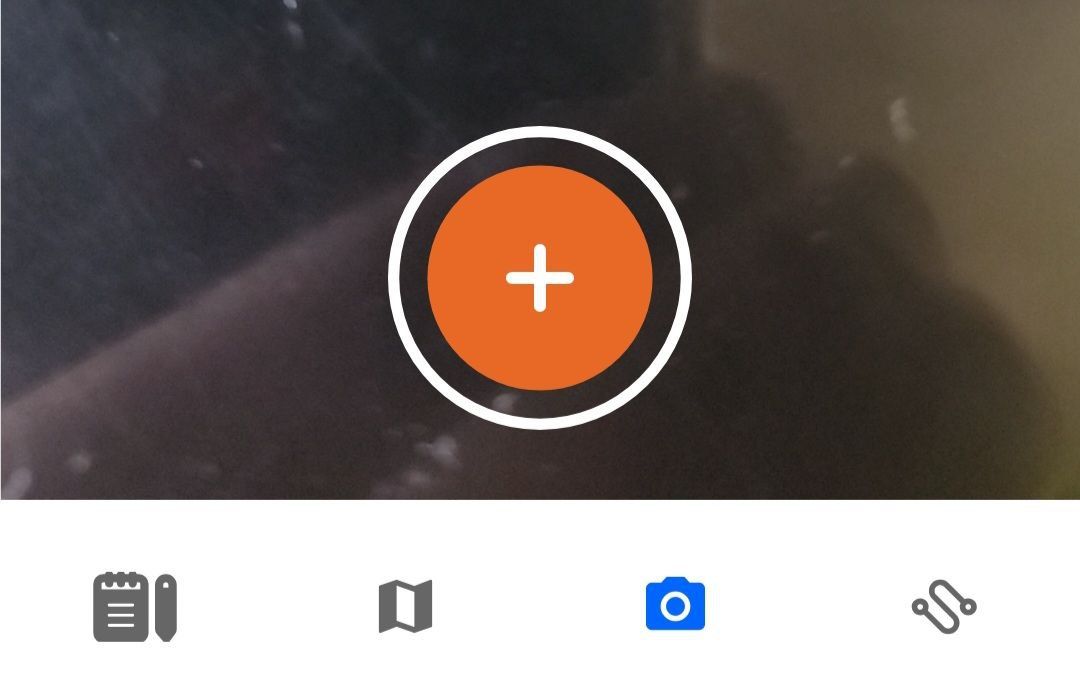
Step 1: From the  map view or the
  camera view, tap the
  add observation button to start creating a new Observation.
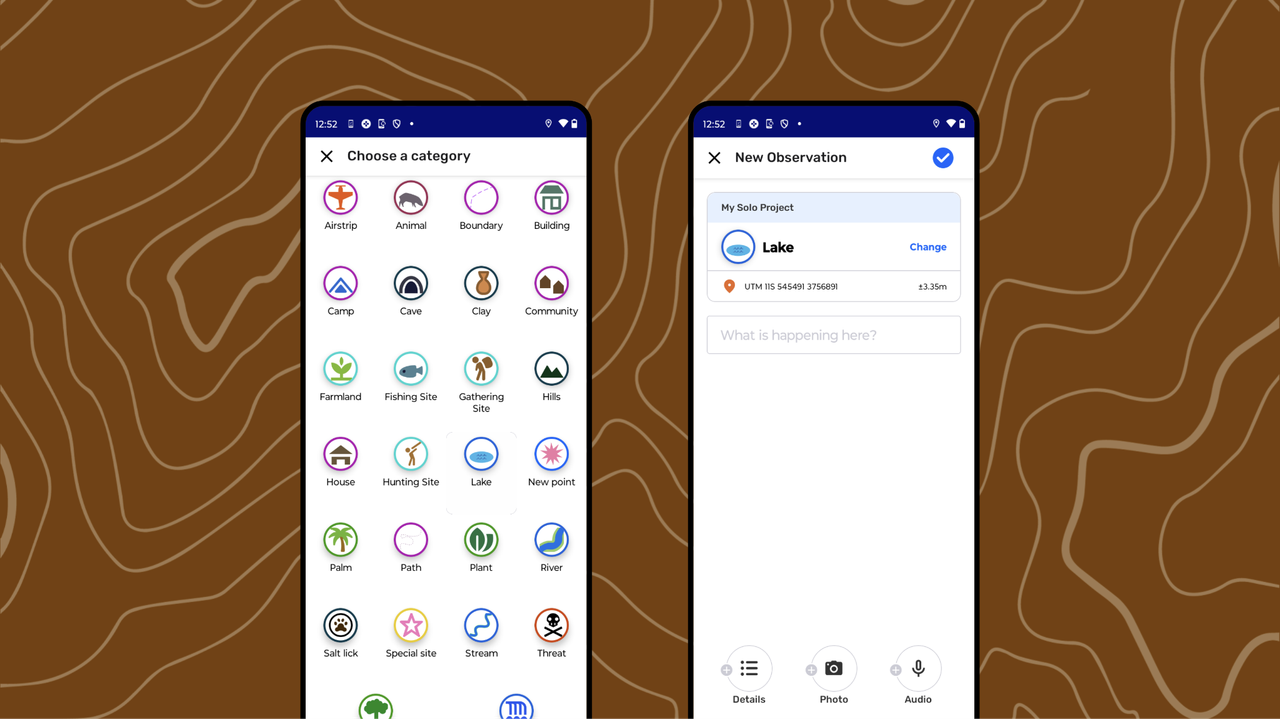
Step 2: Choose a category.
Scroll down to explore the full list of  category options. Tap the icon of the category that best represents what is being documented with the Observation.
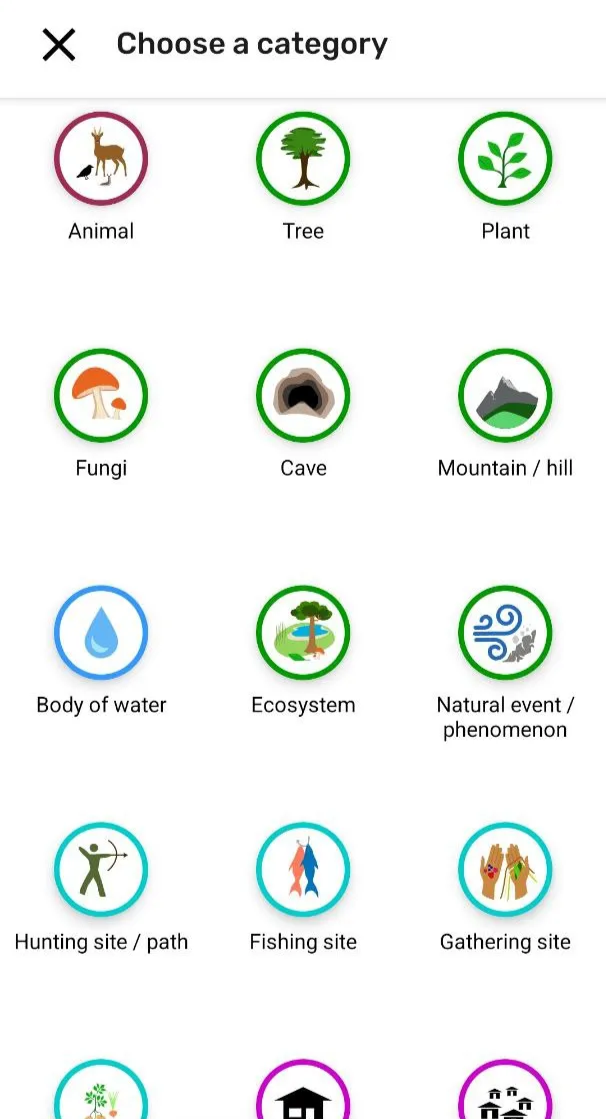
Learn about category sets in CoMapeo 🔗 Go to CoMapeo Categories to learn more
Step 3: The observation editor appears displaying the data to be saved including  GPS coordinates. These may change if GPS sensor data changes. Waiting for good precision before saving is recommended.
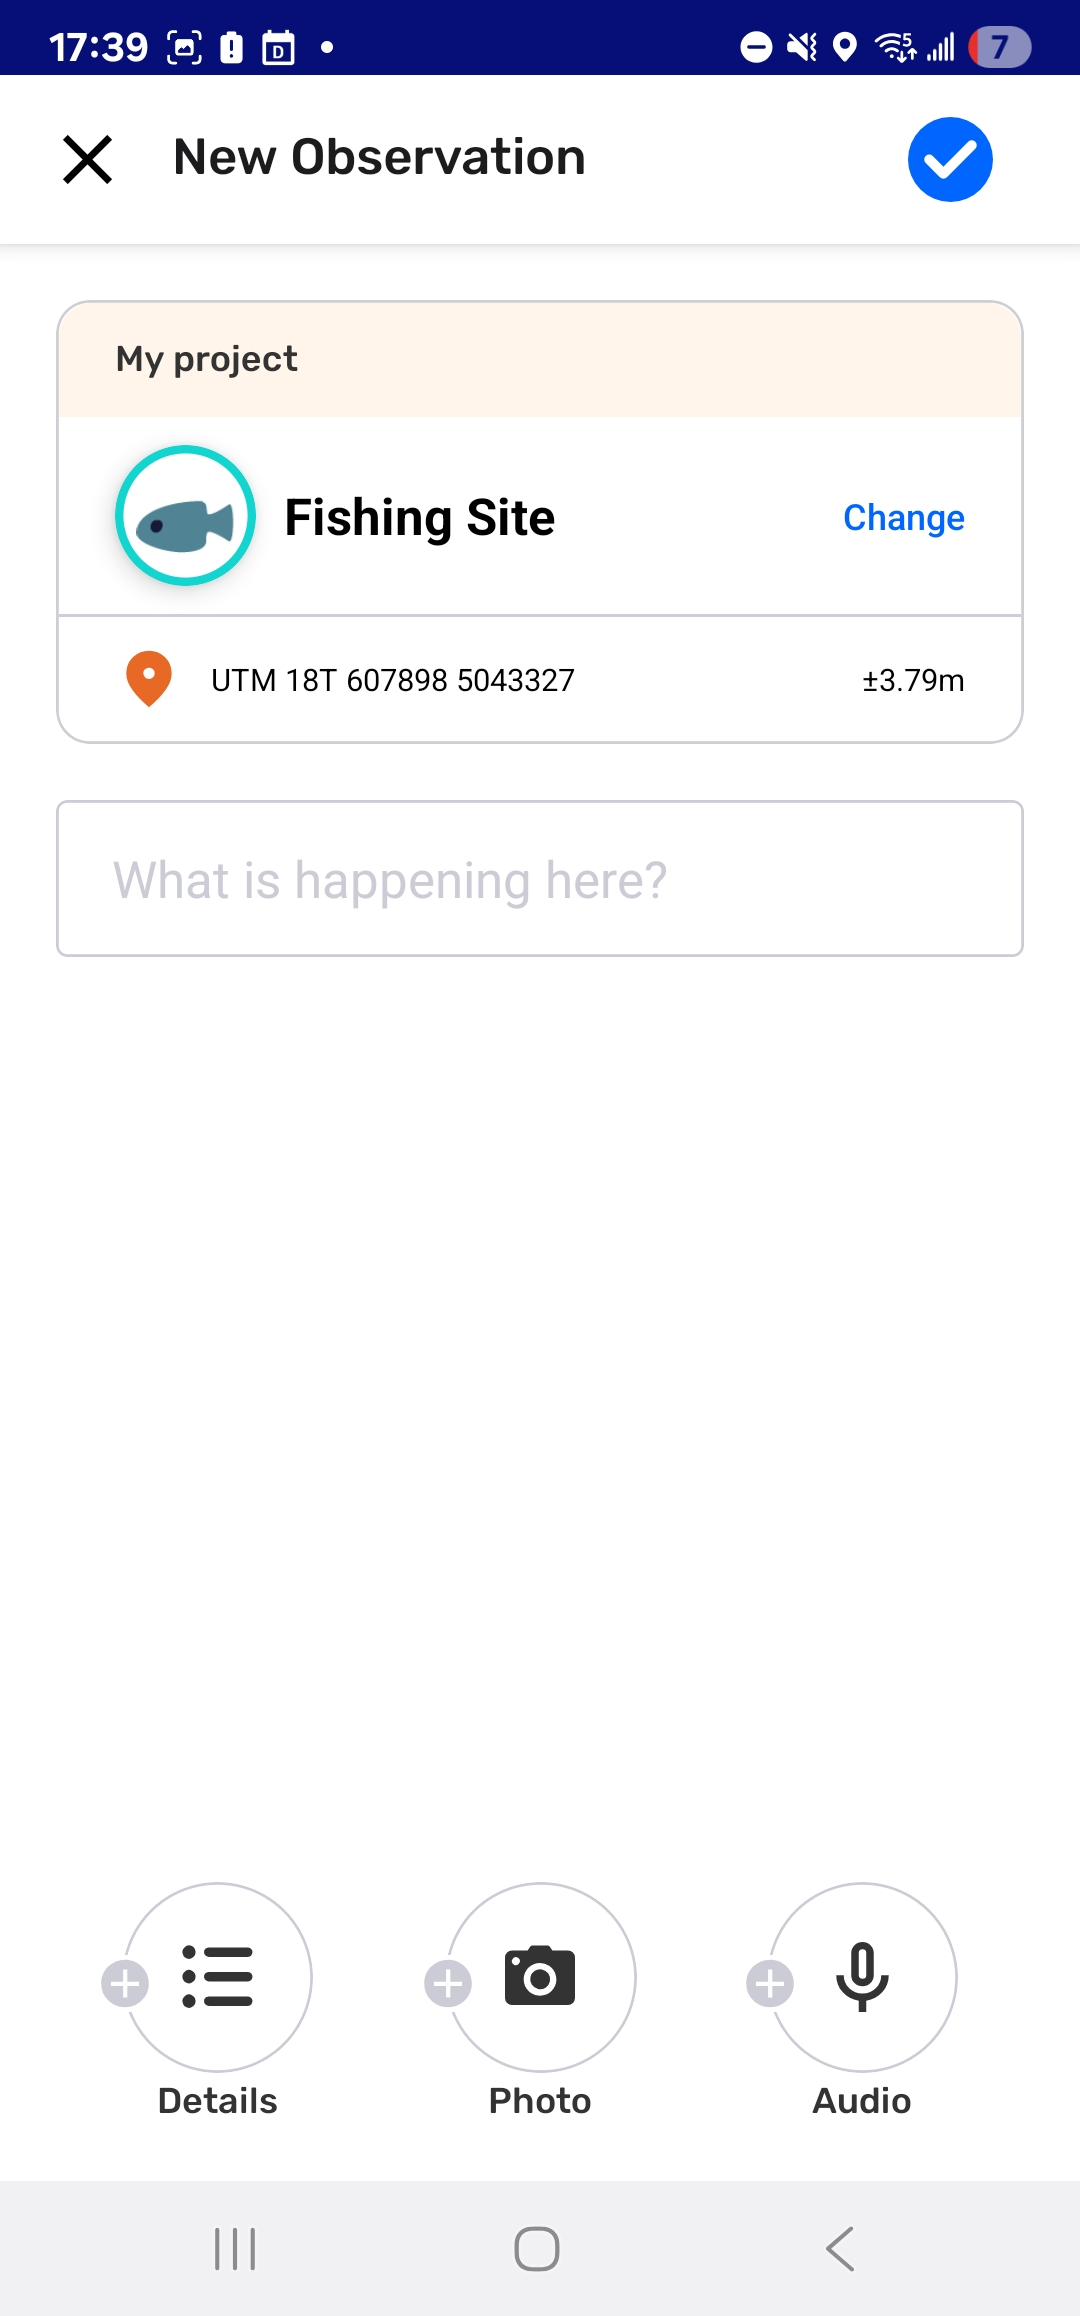
Step 4: Add a description,  details,
  photos, and
  audio as needed.
Step 5: Tap  Save to save your observation. It will now appear on the map and in the
  observation list.
🔗 Go to Saving an Observation for detailed information
If observation is not saved in the location intended, there is no way to edit this information. Be sure to select Save to complete the creation of the observation, or  Close to exit without saving.
Video: @document_4997224092760278339_trimmed.mp4
Adding Details
Details are extra questions that are associated to each category. The specific information entered increases the quality data to help with reporting and evidence collection. Answering these questions is not required in order to save an observation. Follow your project protocol and data collection methodology to make sure data is gathered in the most useful way for the project needs.
Details can also be completed after saving using the  Edit tool
Go to 🔗 Editing Observations
Step by step
Step 1: In the New Observation Editor, tap Details at the bottom
Step 2: Read prompt and respond to the first questions. Responses have 3 predefined formats.  Select one,
  Select multiple, or text.
Step 3: Tap Next to move to the next questions and complete them as needed. The progress through the questions is displayed on the top. Unanswered questions will be left blank.
Step 4: Move through all the questions using Next until the last one is reached.
Step 5: Tap Done to close the details form.
Selecting Done does not save the observation. It only closes the form.
After details are closed the Observation editor returns. Continue adding to the observation by entering descriptive notes in the open text area.
Remember to tap Save as a final step.
Adding Photos
Photos added to an observation are associated with the notes and GPS coordinates and other information collected. Photos can only be added to an observation when taken with CoMapeo camera. It is not possible to attach photos taken from other apps or in a device image gallery. Similarly, photos taken in CoMapeo are not visible in your device image gallery.
See 🔗 Using Observations outside of CoMapeo to learn about options to share photos outside of a project.
Step by step
Step 1: When in the New Observation or Editor, tap on the Add Photo button in the lower task bar to open the camera
Step 2: Compose the photo and tap capture to take a photo.
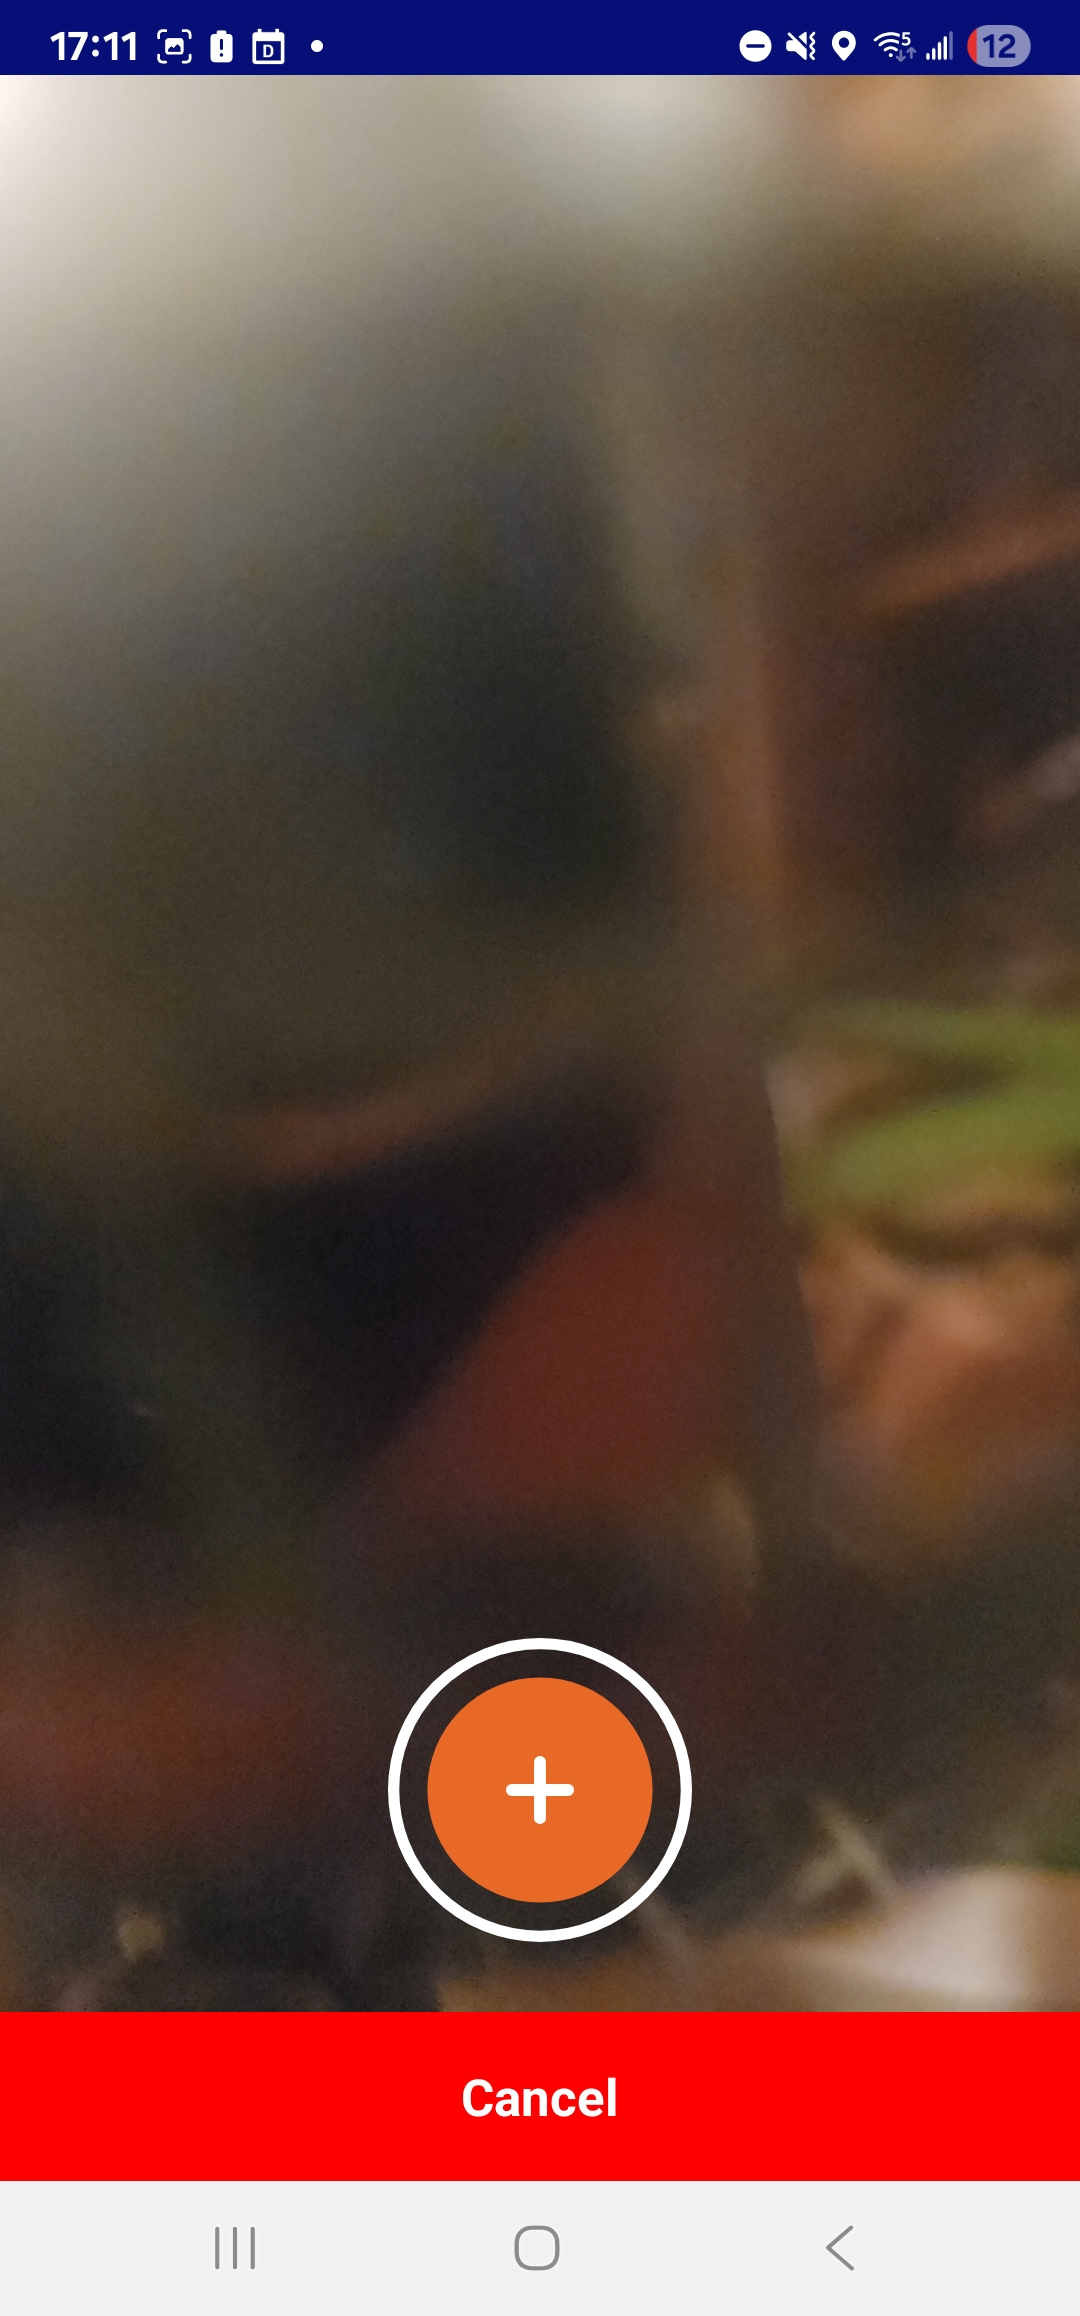
To return to the editor without adding a photo tap ❌ Cancel . There is no limit to the number of photos included in an observation, but each photo uses device storage.
Photos can be added white creating an observation as well as while editing observations. Photo metadata is saved with each photo to support validation
Go to 🔗 Reviewing an Observation
Delete a photo
Removing photos can only happen at the time they are being added to an observation
Photos cannot be removed once an observation has been saved. Delete photos that are poor quality or not useful before saving.
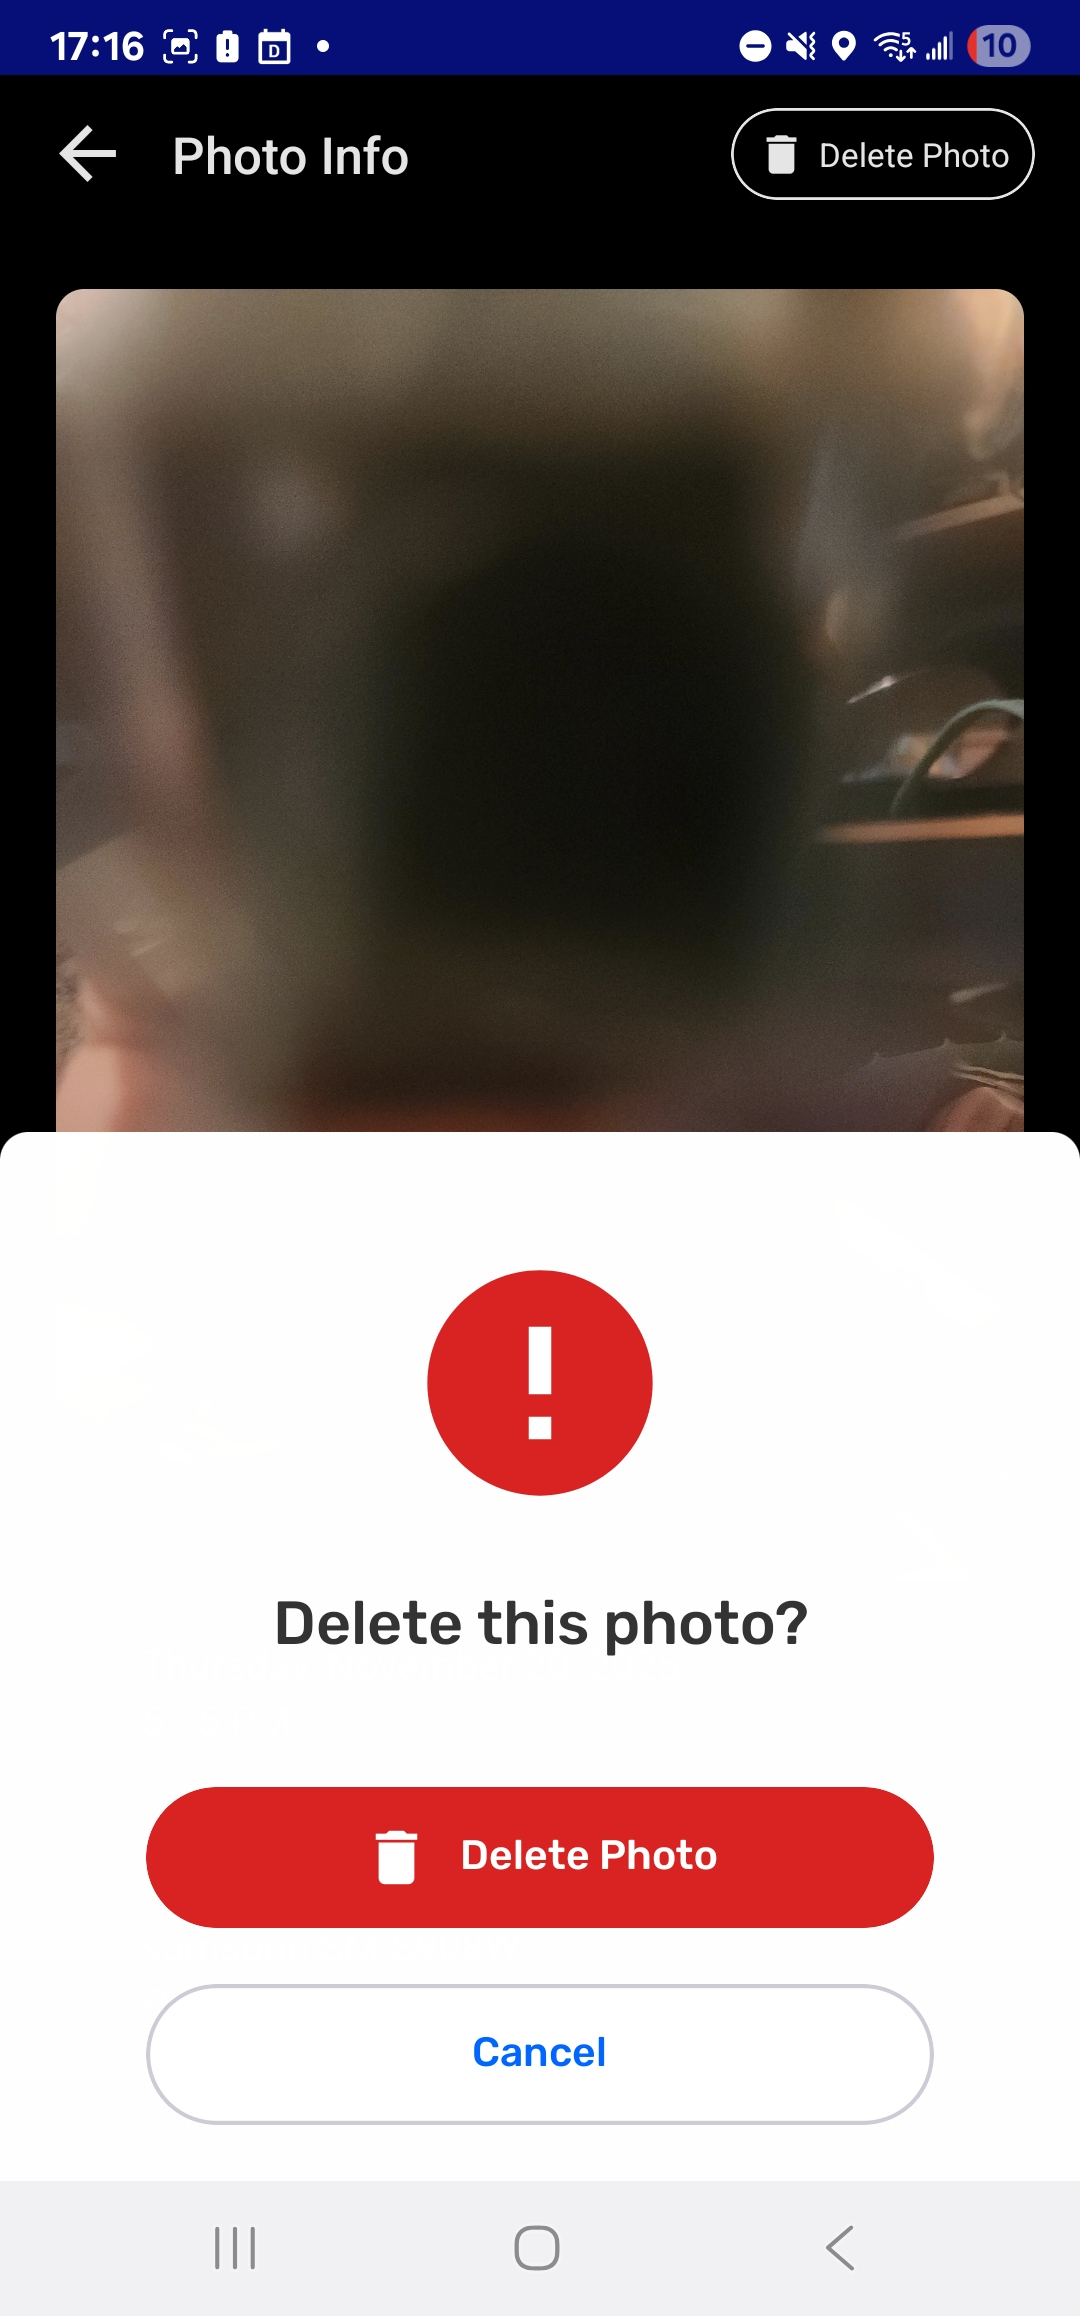
To remove a photo from a draft observation, tap on the thumbnail of the image. The photo is displayed together with photo metadata and options.
Step by Step
Step 1: Tap the photo thumbnail to view the photo details
Step 2: Tap the  DELETE PHOTO button,

Step 3: Confirm deletion with Delete Photo.
Once deleted, photos cannot be recovered. To abort the photo deletion tap CANCEL. Return to the Observation Editor with the  back arrow.
Adding Audio
Adding audio recordings to Observations can provide context, serve as oral testimony, be evidence or data for monitoring purposes, or serve as an alternate manner to collect information on occasions when writing notes in CoMapeo is difficult or dangerous.
Audio recordings will be associated with the notes, photos and GPS coordinates of the observation, and can later be exported or shared together with the other data. You can only add audio taken from within the CoMapeo app at the time you gather the observation, you can not add audio from other sources.
Each audio recording can be up to 5 minutes long. You can add multiple audio recordings to a single observation.
Step by Step
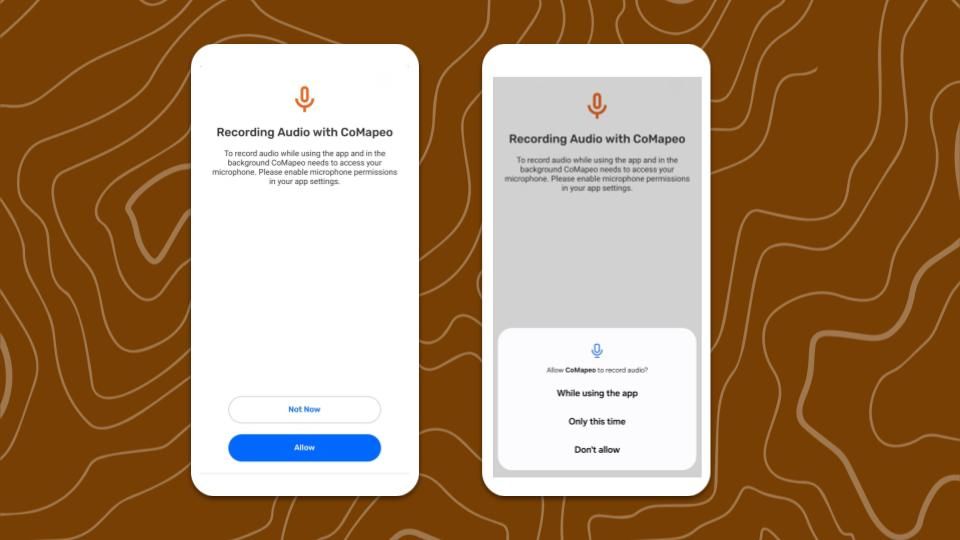
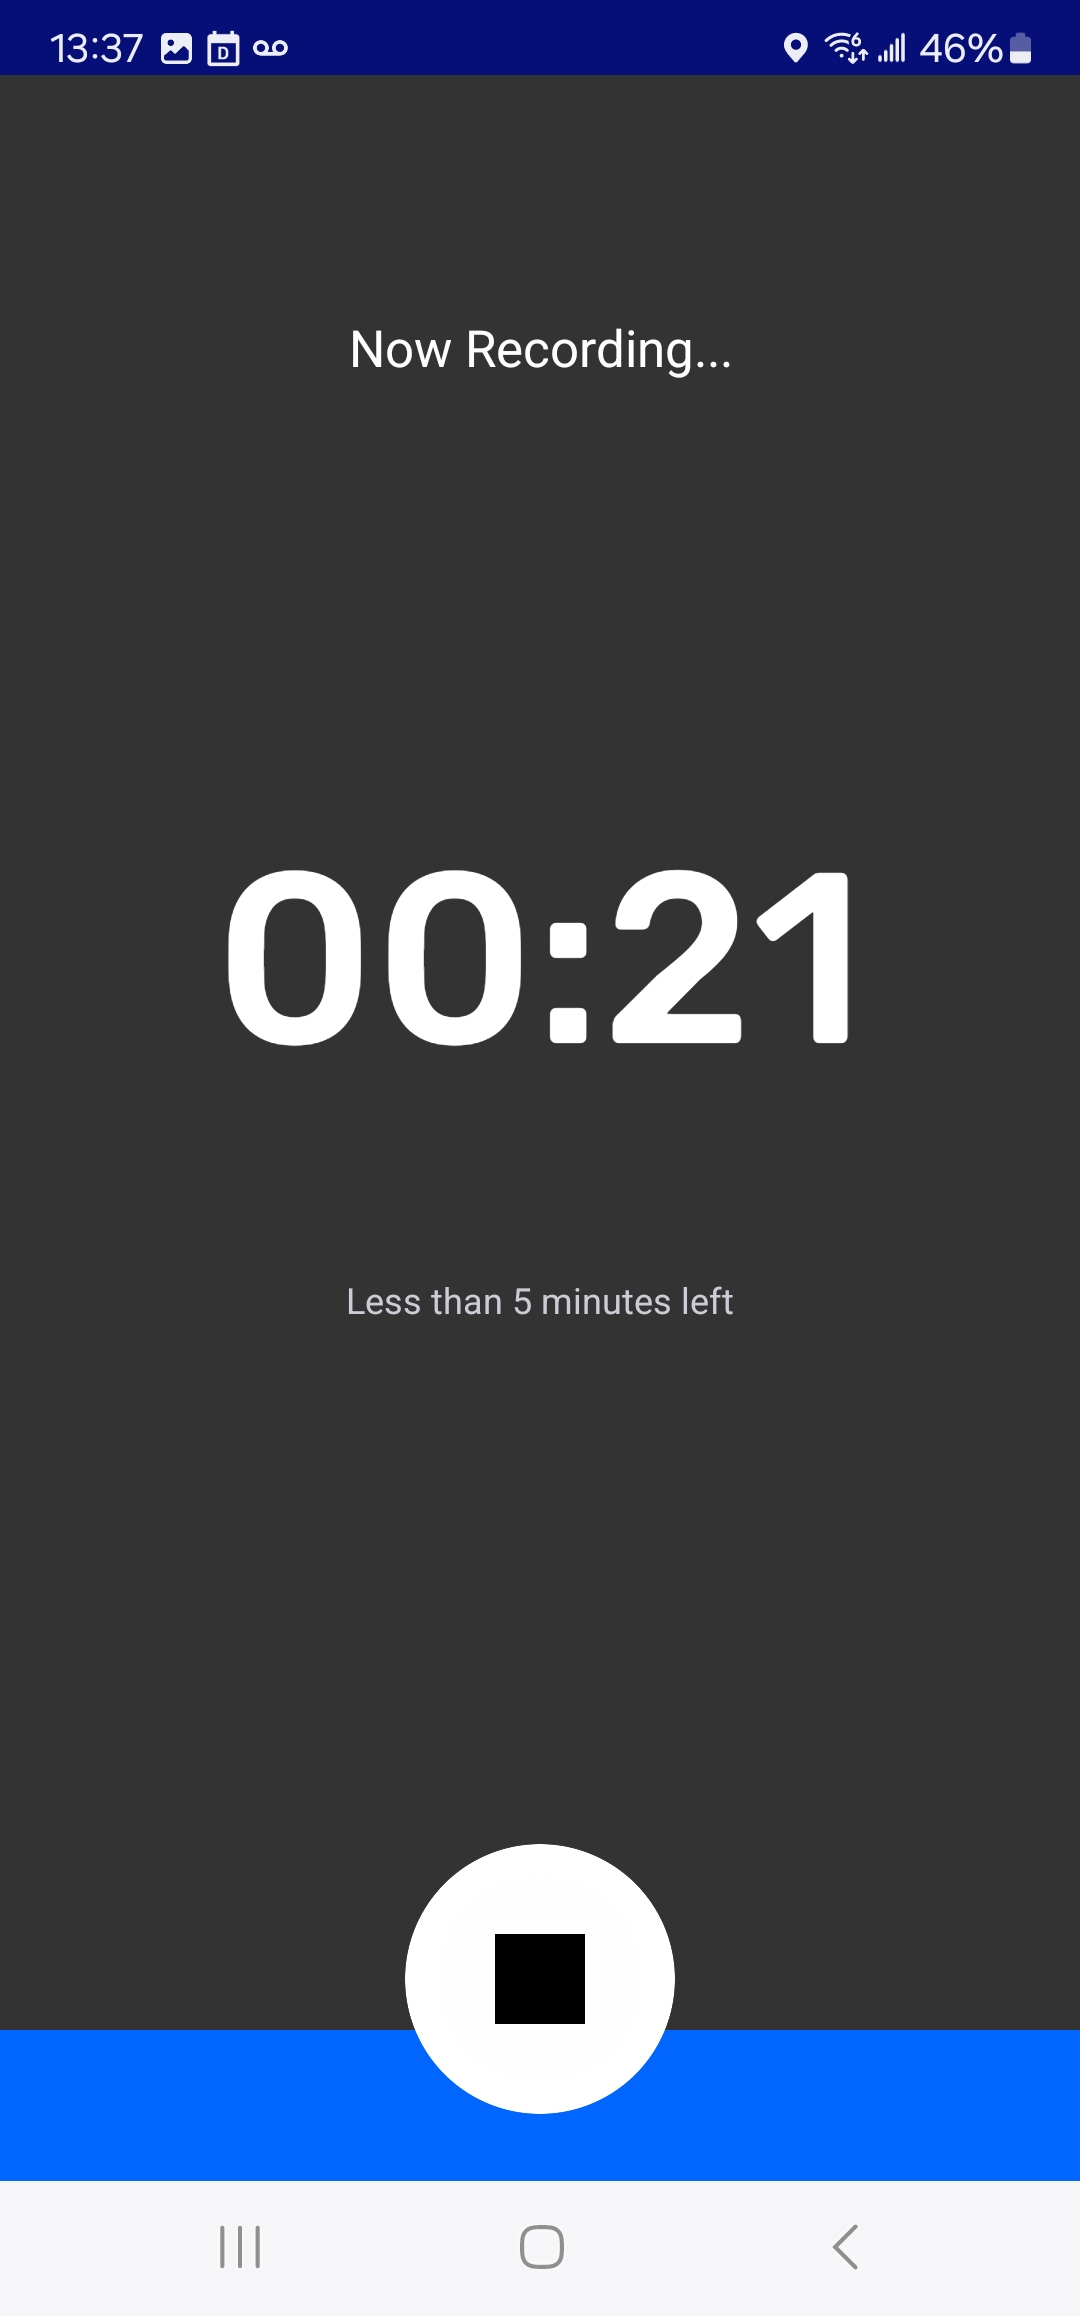
Step 1: Select add audio
Recording will begin immediately.
If this is your first time recording audio with CoMapeo, you will need to grant permission to use this feature. Allow CoMapeo to record audio while using the app
Step 2: Select ⏹️ Stop when done recording.
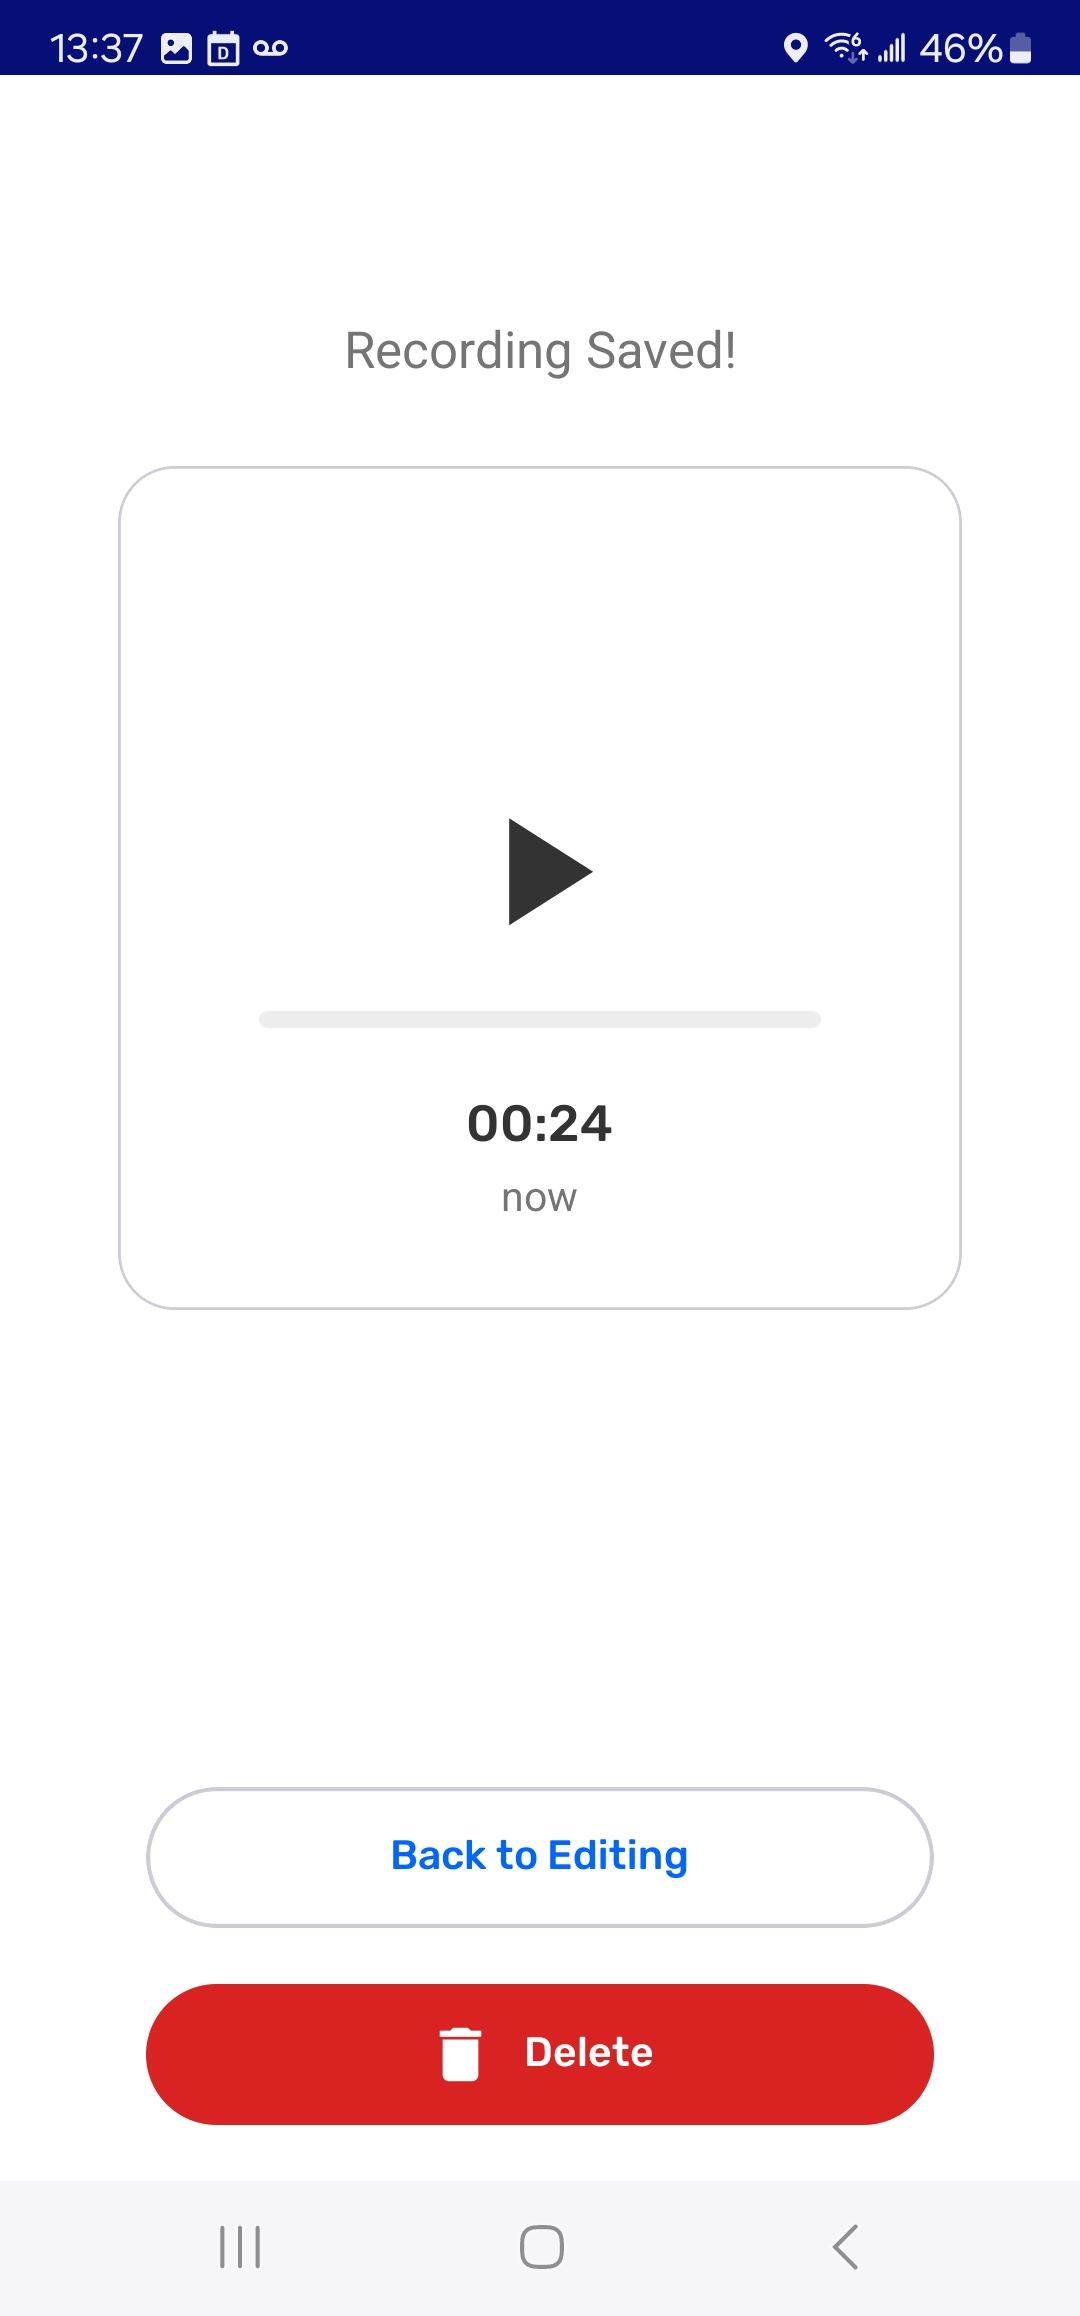
Step 3: Choose and option after recording is complete.
→ ▶️ Listen to the recorded audio.
→ Continue to the observation editor by selecting BACK TO EDITING
→ DELETE the audio.
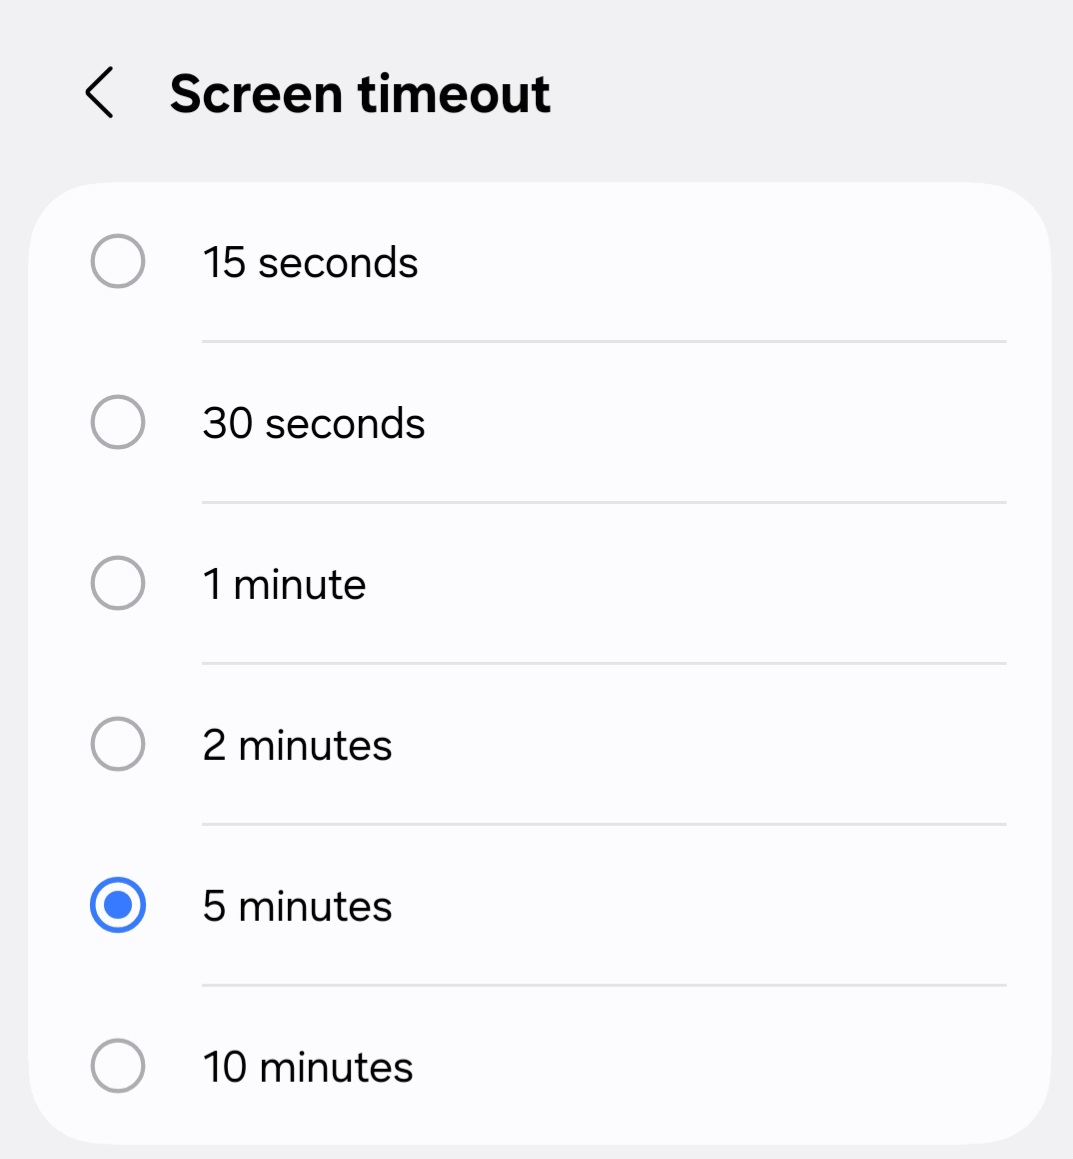
Audio recordings will stop automatically if the screen changes, if you navigate away from the recording screen or start using another app during recording, or if the phone screen times out and goes to sleep. To avoid this audio recording issue change your SCREEN TIMEOUT to at least 5 minutes in your device display  settings.
Deleting Audio
Deleting audio is irreversible. However there is good reason to delete audio if it is not valuable to the observation or project. Audio recordings can take up a substantially higher amount of device storage compared to photos.
Once an observation is saved the audio cannot be deleted.
Step by Step
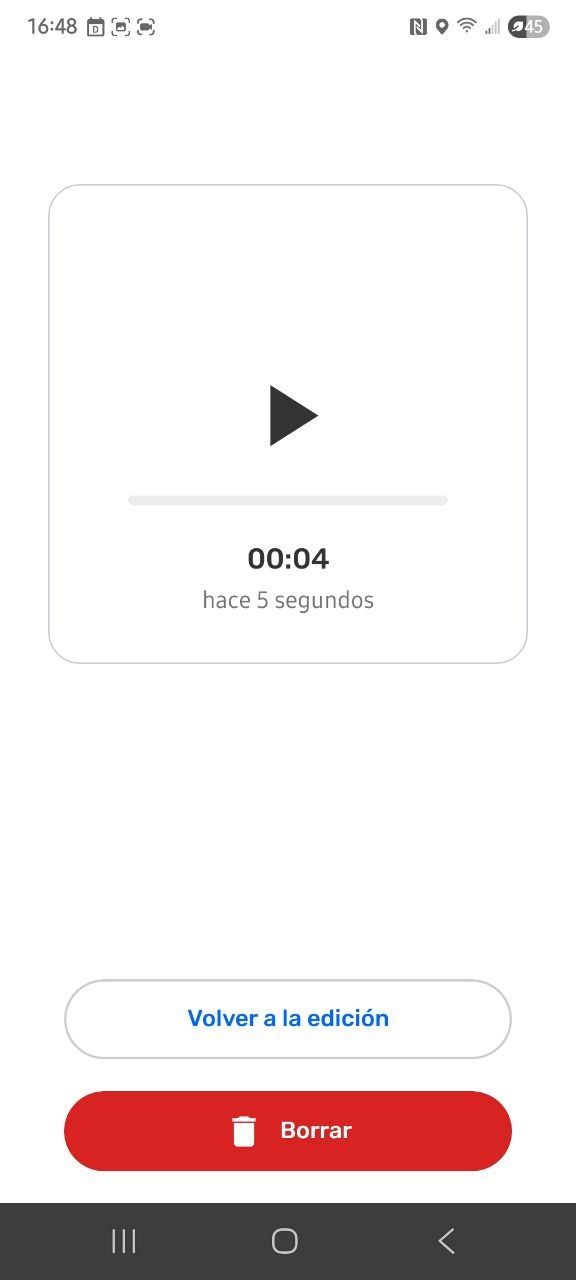
Step 1: Tap the audio thumbnail to preview the audio recording
Step 2: Tap the DELETE button.
Once deleted, audio recording cannot be recovered.
In order to prevent media files from taking up device storage when working in a team, adjust Exchange settings. Go to 🔗 Understanding How Exchange Works → Adjusting Exchange Settings to learn more.
Saving an Observation
Save an observation by tapping the blue checkmark at the top of the screen. Once an observation has been saved it will appear in the observation list and on the map screen.
Information that is saved and cannot be changed is:
-
GPS coordinates
-
Date and time
-
Observation metadata
-
Photos taken when observation is saved
There are several other kinds of data that can be edited after an observation is saved. This is helpful for situations that require quick data collection, and thorough completion of descriptions and details.
🔗 Go to Editing Observations for more information.
Saving when GPS accuracy is low
GPS accuracy is a metadata property calculated by the GPS sensor in a device. It is based on information provided by satellites. This information is displayed in CoMapeo Mobile on the map screen and camera screen, left of the capture button  . It is also displayed in the coordinated on the Create Observation screen and will update until the observation is saved.
If the coordinates have an accuracy of worse than ±10m or if there is no GPS signal at the time of saving the observation, CoMapeo offers three options.
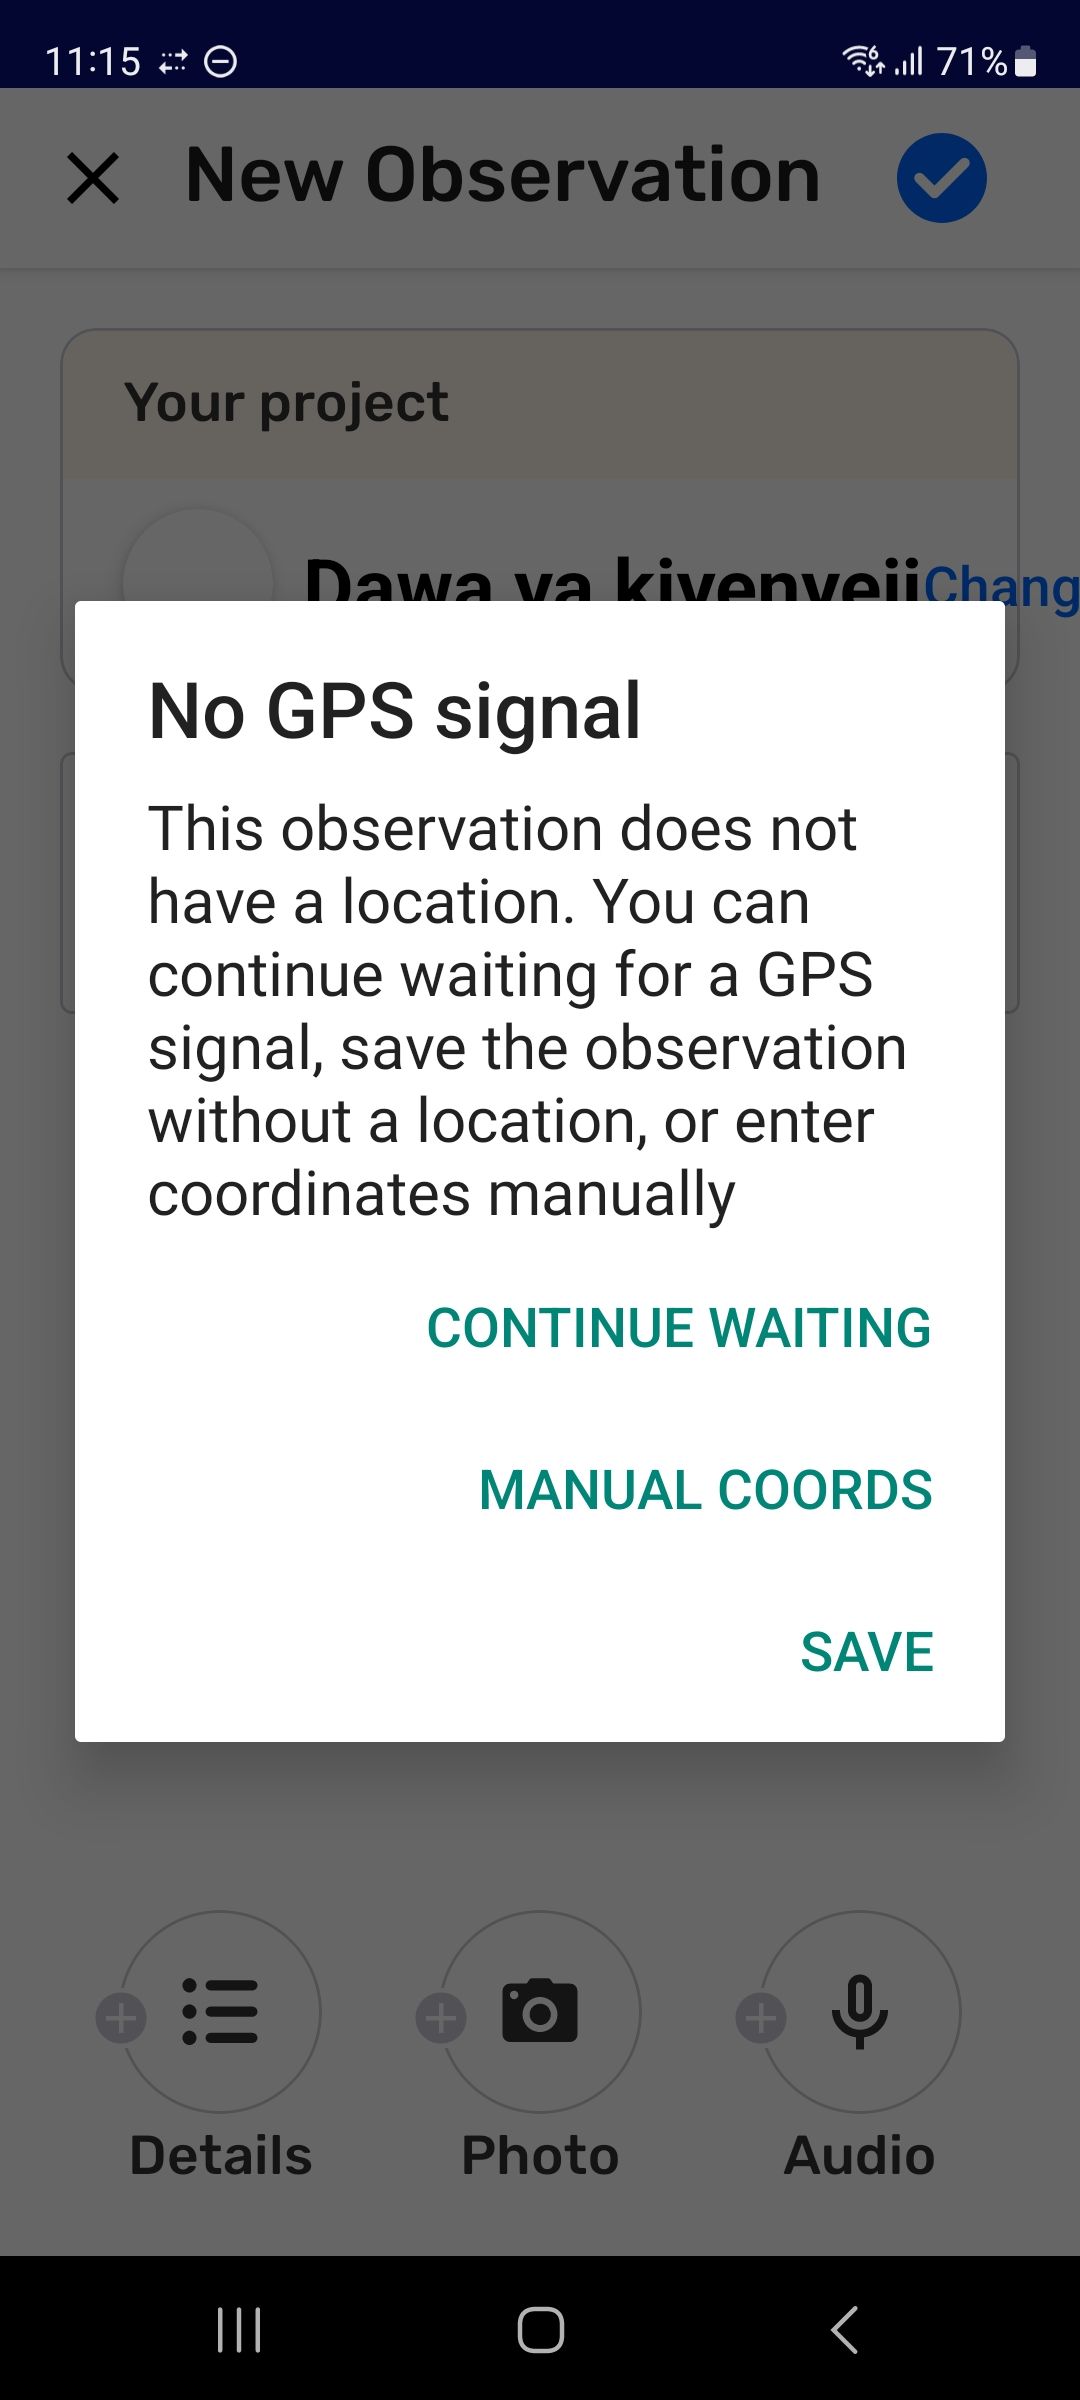
-
Continue waiting until the GPS signal improves to get better accuracy. Time and slight maneuvers usually help. Checking the
coordinates until accuracy is better than ±10m, and tapping then, will prevent the GPS warning from appearing again. -
Save to use the current GPS coordinates, even if accuracy is worse than ±10m. Consider if this is satisfactory for the purpose of the data.
If you save an observation without GPS coordinates, it will not appear on your map, but it will still appear in your observation list.
- Manual entry of coordinates is a practical option only if you have access to another GPS device with better sensors and accuracy. Alternative measures should be taken if data validation is important for the observation.
Manual entry of coordinates
Manual entry of coordinates is never an ideal situation but sometimes needed if a phone’s GPS sensor is not adequately reaching GPS satellites. This can happen in remote regions, under dense canopies, in buildings or when cloud cover is heavy.
CoMapeo cannot validate observations where coordinates have been manually entered. CoMapeo validated observations by including GPS metadata from sensors and attaching relevant data as Observation Metadata. Observations without these details will display as unvalidated by CoMapeo.
An alternative for validating data is to add photo to the observation of the coordinates and precision displayed on a device with a better GPS signal. Do this before entering coordinates manually.
When submitting these observations for legal or scientific scrutiny, send the observation together with observation metadata and photo metadata.
Step by Step
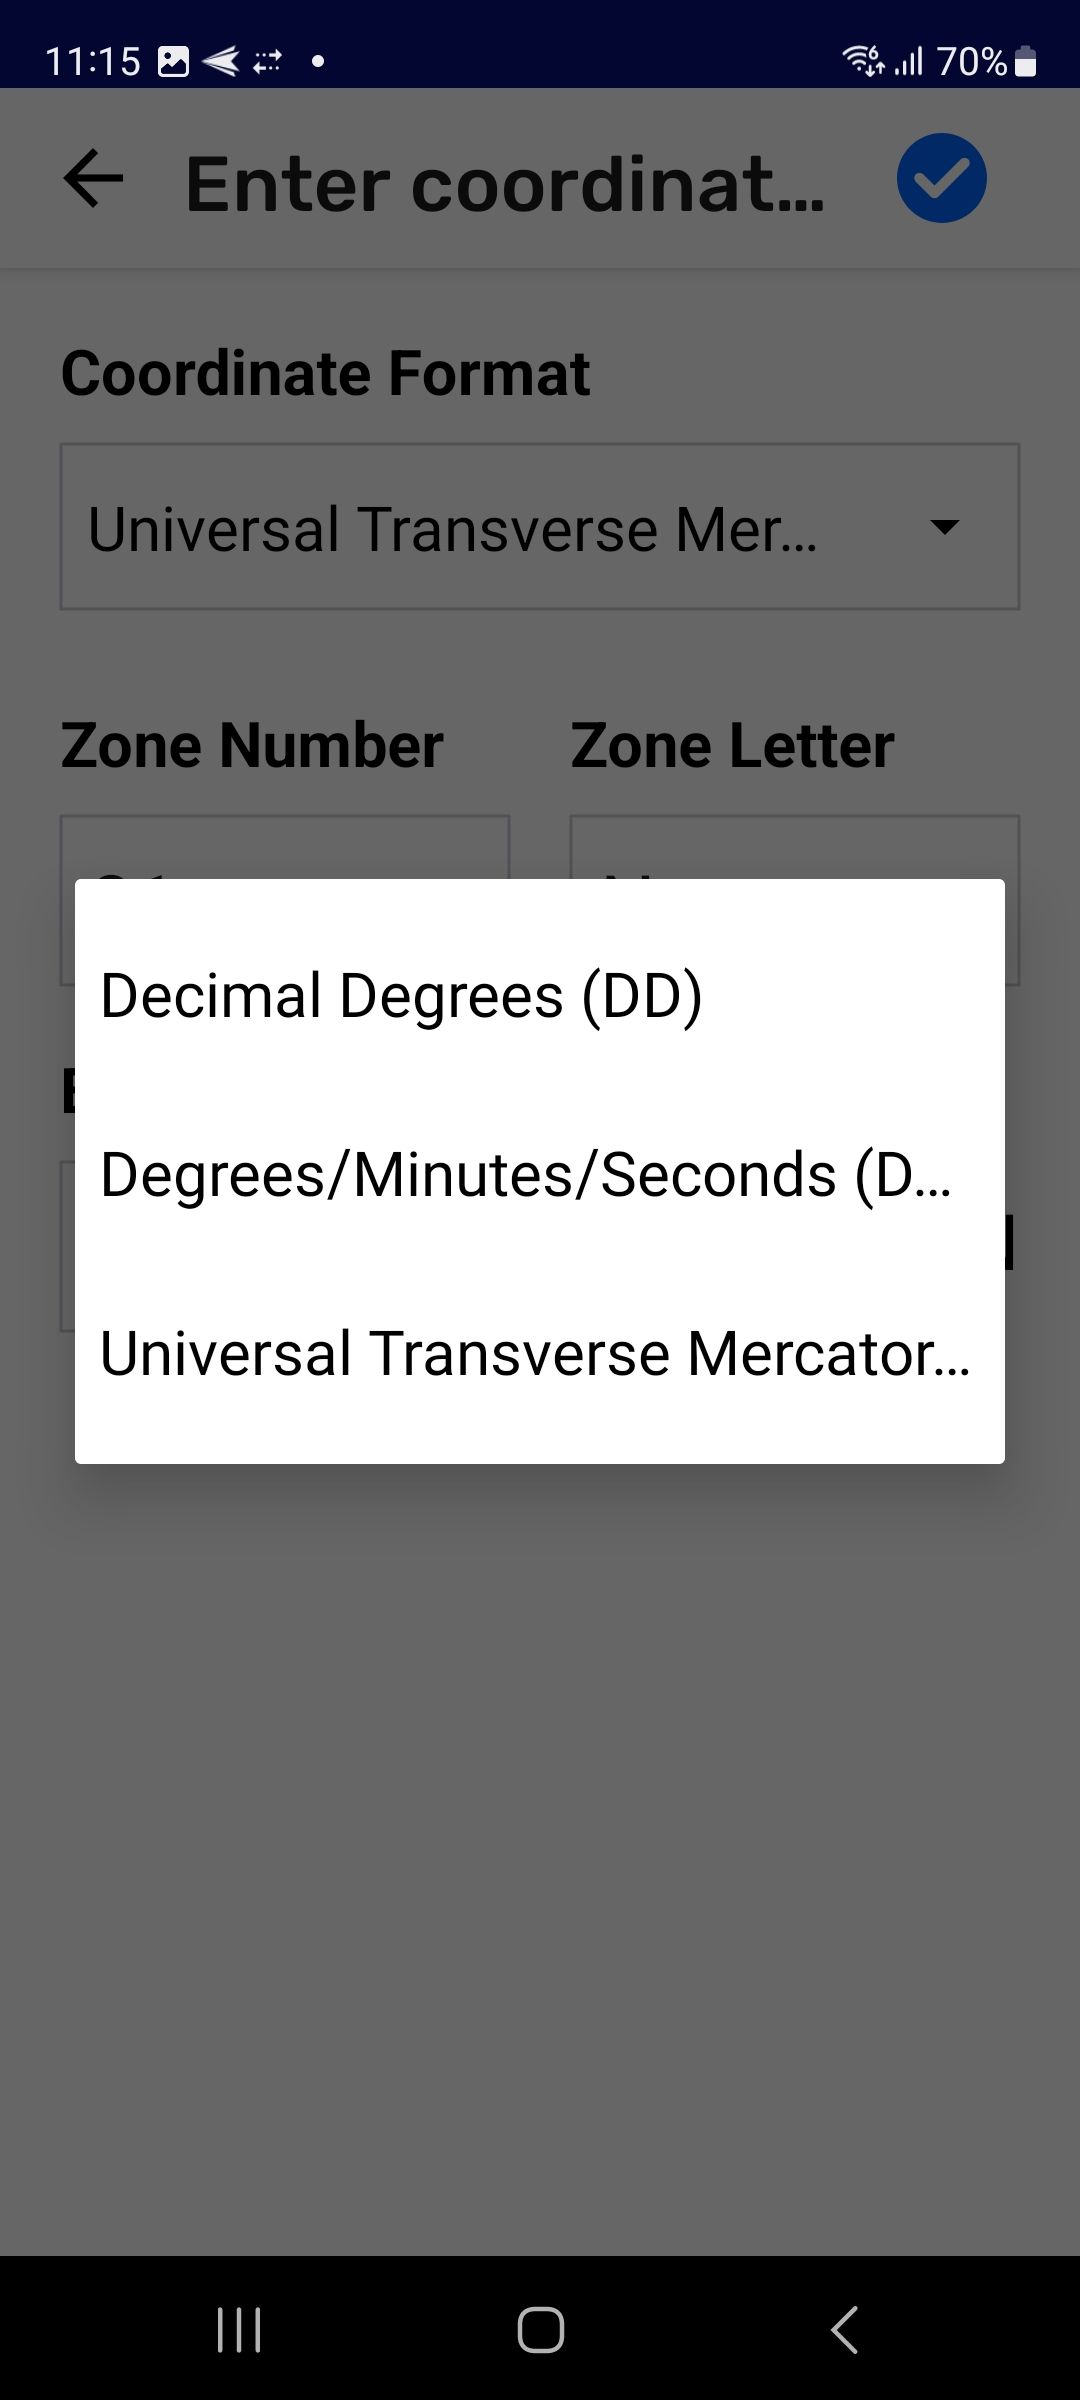
Step 1: Select MANUAL COORDS to open the Enter Coordinates screen.
💡 Tip: To return to the options tap the Back button
Step 2: Choose your Coordinate Format, to match the format of the other device. Options include Decimal Degrees, Degrees/Minutes/Seconds or Universal Transverse Mercator.
Step 3: Carefully read and copy coordinate details from the other device. Enter required values completing all fields.
There is no way to edit the coordinate information entered after it is saved .
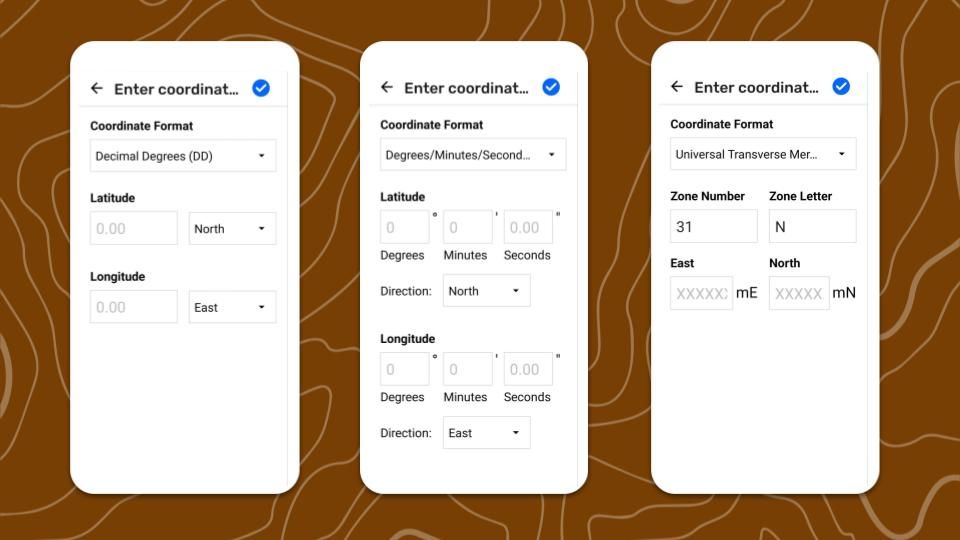
Step 4: Tap Save. The observation is saved with the coordinates at the same time.
Related Content
Go to 🔗 Exploring the Observation List
Exploring the Observations List
Go to 🔗 Reviewing an Observation